Sunday, January 30, 2011

side dishes for the American icon

Sometimes we just have to have a big steak.  Well, sometimes Jim just has to have a big steak.  I am happy with three or four ounces of meat, plus a couple of side dishes.  I try to do something green, but I am also fond of potato with steak.  One of my favorite ways to make potato is to do a twice-baked potato.  It is an easy preparation, that can be done in a couple of steps.  When the oven is already on, you can bake a potato and simply store it in the fridge.  Then, when you are ready to make your twice-baked potato, shred a little cheddar cheese.  I prefer a very sharp white cheddar, because it offers up big cheese flavors without the necessity of using much of it.  I also like to add a little horseradish, a bit of dried or fresh shallot, white pepper, and salt.  But the options are nearly limitless.  In the summer, if I have them in the garden, I add some chopped chives.  A touch of nutmeg is nice.  Different varieties of cheese can be a welcome change, such as Gruyere or Parmesan.  Adding a little thyme or chopped parsley can be nice.  As can a crumbled up slice of leftover bacon.   I sometimes use cream for moisture.  Sometimes sour cream or creme fraiche.  Last night, I had buttermilk, which is a lowfat option for making creamy potatoes.
add your chosen aromatics to a bowl, 
then you can simply add the mashed potato and some moisture

One tool I rely on when making potatoes is a ricer.  I love it for the ultra-creamy texture it gives to potatoes.  Just scoop the baked potato out of the shell, and run it through the ricer for very creamy lump-free potatoes.
A ricer makes very creamy and light potatoes

the creamy potato mixture can be spooned into the potato shells or,
for a more dramatic effect piped in with a piping bag

Twenty minutes in a 400 degree oven produces light puffy potatoes with a cheesy bite.
I love the crisp brown bits on the top of the baked potato

There are several things that always have a home in my fridge.  I am never without garlic, onions, mushrooms, sweet red peppers, or lemons.  They last a long time, and they can be pressed into service for everything from vegetable dishes to sauces and soups.  
 kitchen staples garlic, red peppers, and mushrooms pressed into 
service for a broccolini side dish

I had a bunch of broccolini last night, which can be pretty boring just steamed and dumped in a bowl.  So I minced some garlic, slice up some mushrooms and red peppers, and heated a little oil in a pan.  The mushrooms and peppers sauteed for about 10 minutes on fairly high heat, to coax out the moisture and caramalize them a bit.  Then the minced garlic goes in for a quick two minute saute on a bit lower heat to bring out its wonderful fragrance.   Then the broccolini goes in with half a cup of wine, or half a cup of water and the juice of half a lemon, and steams until it is just crisp-tender, and a beautiful bright green.
everything sautes in just a few minutes


mixing up your veggies adds interest and texture to any dish

Monday, January 24, 2011

Italian American treat

I am a sucker for a good chicken parm.  Unfortunately, it is all too rare in a sea of Italian American joints that serve flabby, overcooked chicken, swimming in a sea of gloppy cheese and overly sweet sauce.  Ugh.

As I have said before, my tomato sauce has simplified over the years.  All my complicated herb combinations and long list of ingredients has fallen by the wayside in favor of a very simple sauce that pops with tomato flavors and the heady scent of garlic.  Its simple.  Garlic sauteed in a good bit of olive oil, diced tomatoes, salt, and red pepper flakes.  I then give it a short buzz with the immersion blender to smooth it out a bit and give it a creamy texture.
tomato sauce, simple and full of flavor

The chicken is pretty simple, too.  I either buy chicken cutlets, or let out a bit of aggression by pounding chicken breasts thin -- to about a quarter inch.  I cooked some linguine and tossed it with the sauce.  While the noodles were cooking, I doused the meat with buttermilk, then pressed them with a good coating of Panko breadcrumbs seasoned with salt and pepper.
the coated cutlets are simply sauteed in a bit of hot olive oil
they cook for about 4 minutes a side

I am not a fan of flaccid chicken swimming in gooey cheese.  I want my chicken crisp, so I skip the layer of sauce, and sprinkle on a bit of parm.
the cheese will melt on the hot cutlets, but a run under the broiler
will speed up the process

Simply serving the chicken over the sauced noodles makes for a great dish.  A little added parsley brightens up the whole thing.
feeding an Italian American addiction

Monday, January 17, 2011

scampi, the sequel

Most home cooks have just a dozen or so by-heart recipes in their repertoire.  What they don't realize is that a few small changes can transport those dishes into a whole new realm.  I really enjoy the marriage of shrimp, garlic, and butter; and I had all three in the house today.  I also had some spinach left over, as well as some oven-dried tomatoes in the freezer.  I don't care for the appearance of tomato sauce with spinach pasta, but with dried tomatoes, I thought it might be nice.  And I like the touch of home made pasta, which is a snap with a food processor and a pasta roller.
the pasta starts with a couple of cups of washed spinach
and an egg

Once the spinach leaves and eggs have been pulverized, in goes the flour.  I ended up using a cup and a third.  One quick aside -- I never use cooked spinach for spinach pasta, even though that is typical of spinach pasta recipes.  When you use fresh, the cooked noodles are a bright, fresh green, rather than a sad, gray-green mess.  The added bonus is that you don't have to precook the spinach, so the dough comes together in under two minutes.
enough flour is added to make a pebbly looking mixture

that gets wrapped in plastic wrap and rested for half an hour

rolling the dough takes a couple of minutes with a pasta machine

the cut noodles are then tossed with a bit of rice flour

The rice flour better resists turning gummy, but regular flour will do in a pinch.  Seriously, including the rest time for the dough, I made homemade spinach noodles in under a half an hour.  Seems like they should be in just about any cook's repertoire.  But I suppose I am kidding myself.  If you don't feel like doing it, just buy some fresh spinach noodles at the market.

I had some oven dried tomatoes in the freezer that I did last summer, but sun-dried tomatoes would work just fine.
cute little oven-dried tomatoes from last summer's farmer's market

I sauteed four cloves of garlic in a tablespoon of butter for under a minute, added some shrimp, sauteed those for about 3 minutes, then added a cup of wine, took the shrimp out of the pot, and reduced the butter and wine with the tomatoes.  I added in the juice of one lemon, and a bit of salt and pepper.

The reduced sauce is infused with the tomato flavor, without the muddy color

The shrimp jumps back into the pot for two minutes.  Then in goes the cooked pasta (which cooks in under two minutes), everything is tossed a bit, and on to the plate.  You truly can make a flavorful and interesting meal in under an hour.  And the more lovely thing for me is, even if your puttering and futzing about, this still all comes together in under two hours.  

not bad looking for a Monday night dinner

Saturday, January 8, 2011

an adventure with flour?

I love a thin, crisp pizza with a bit of char on the crust, and just a sprinkling of toppings.  Not for me, the oozing cheese and topping overload that dominates the current chain pizzeria world.  Which led me to the google world of pizza.  And one reoccurring theme in that world was double zero flour from Italy.  It wasn't easy to find, it was expensive, and from the majority of sources, it required purchasing a very small quantity at a ridiculous price, or buying a 55 pound bag, and what was I going to do with 55 pounds of flour?

Finally, I found a source that was parceling out 20 pounds of the by now must-have flour.  So I ordered.  And, much to my surprise, it most certainly makes a difference.  The dough, produced with water, salt, and yeast, stretches more easily than dough produced with all purpose flour, and is certainly WAY more manageable than dough made with bread flour.
I always start the dough with a sponge


A sponge is really just the dough, made with less flour than you will ultimately need.  It allows part of the flour to really hydrate, and kick starts the yeast.
with the final addition of flour, the dough is still soft,
but elastic and workable
The Italian flour was extremely supple, and stretched easily.  I heated a pizza stone in a 550 oven, because I was too lazy to pull out the grill and heat it.  The grill is really the only way  mere mortals without a pizza oven are able to hit temps over 800 degrees, which is ideal for thin crust pizza.  The dough made such a difference on the final texture of the crust that next time I won't be so lazy.  The additional 300 or so degrees will certainly make a difference.
the sauce is an exercise in simplicity -- sliced garlic poached in
olive oil, fire roasted tomatoes, salt, and red pepper flake

When I first started making pizza, I made a very complicated sauce, loaded with a variety of herbs and aromatics.  Over the years, I have discovered that in the case of pizza sauce, less is more.  Limiting the flavors to garlic, salt, and pepper allows the tomatoes to really shine.  I adore the fire roasted tomatoes from Muir Glen.  I even prefer them to San Marzano tomatoes from Italy, which is heresy in the world of pizzafiles, but oh well.  I do take some perverse pleasure in being an iconoclast.

The toppings for this pizza were simple.  I found some fresh buffalo mozzeralla, so I used that, along with a little pesto I had in the freezer, and a bit of parmesan cheese.
toppings are limited, to let the crust really shine

On the buffalo mozzarella... well, for me, it wasn't worth the price tag.  Perhaps what I found wasn't a stellar example of the cheese, but I hardly tasted a difference between it and cow's milk mozzarella.  I will refrain in the future, unless someone convinces me that a different brand has a markedly different flavor profile.

Even in the wimpy 550 oven, the pizza browned and crisped beautifully.
a crisp crust, with a bit of char

So, in the end, I certainly think it was worth seeking out the Italian 00 flour, and I will continue to experiment with it.  I want to try making pasta with it.  Since it makes such a supple dough, I imagine it will make very silky pasta.

The big lesson here is to know your flours.  All purpose flour is great for a lot of things, such as popovers, cookies, and general use in the kitchen.  Very soft flours, like pastry flour and White Lily (a soft winter wheat flour available mainly in the South) are great for tender baked goods cut with fat, such as pie crusts, cakes, pancakes and biscuits.  Bread flour is good for bread, but I think it is too glutinous for pizza dough, and results in a tough crust.  

The more I cook, the bigger the variety of flours that find a home in my pantry.  Right now I have a little can of Wondra flour for thickening, white whole wheat flour (a variety of very light flour that looks much like white flour, but is whole grain -- love it for bread), Italian 00 flour, all purpose flour, corn flour, pastry flour, White Lily, rice flour, potato flour, and semolina flour.  I need a bigger pantry....

Tuesday, January 4, 2011

the vegetarian life?

I saw a training video today, featuring a speech by the WF CEO, John Mackey.  I didn't have time to watch the whole thing, but he was essentially advocating a diet with whole foods, and little or no animal protein, processed foods, or sugar.  He defines processed foods as the obvious (cheese doodles and candy bars) along with the less obvious -- cheeses, milk, vegetable oils, meat, butter, and eggs.  Not sure I see how eggs are "processed" but I do know that life is healthier with less of all of those things.  I'm not ready to give up meat, or eggs, or butter for that matter, but I am ready to look for ways to incorporate more veggies into my diet, along with less fat, and animal protein.

To me, that means thinking of meat as more of a condiment than a main dish, and going easy on the cheese and butter.  The cheese is a particularly tough one for me, as is the butter.  And let's not even discuss bacon -- a food group of it's own for my taste buds, though I don't really eat that much of it.  A once a week treat for me.

At any rate, the video got me thinking of dishes that are interesting to me as vegetarian meals.  Which lead me to chili.  A chili rich with vegetables, beans, and warm spices hardly needs meat to be satisfying to my palate.  And there is no better way to cook beans than the pressure cooker.  It can do in 20 minutes what takes all day to do on the stove.  I used Adzuki beans, which are small red beans, cooked for 10 minutes in the pressure cooker.  While they cooked, I roasted a variety of peppers, some garlic, zucchini, leek, and onion.
the veggies require very little prep -- peppers can be
roasted whole, and the onions quartered, but the 
leeks really need to be cleaned

roasting the veggies draws out the oil,
and creates a silky texture

Once the beans are partially cooked, the chopped veggies can be added.
the veggies require only a rough chop

The veggies, a couple of tablespoons of chili powder, a couple of teaspoons of ground cumin, and a couple of teaspoons of oregano and salt go into the beans, along with a 14 ounce can of diced tomatoes, and the mixture is pressure-cooked for another ten minutes.  The result?  A rich, thick chili with loads of flavor, no added oil, and a great variety of vegetables.  But I do love a little cheddar cheese with my chili, so I grated on a bit.  I adore good cheese.  The secret, of course, is to buy well-aged, strongly flavored cheddar.  Then, a little goes a long way.
would anyone even notice that the meat is missing from this sort of dish?

Thursday, December 16, 2010

the dreaded Brussels sprout

My first cooking demo was last Saturday, and it was Brussels sprouts.  When doing an actual cooking demo, the rule is that you have to do the veggie chosen by the produce manager, but you can cook it any way you want.  When I told Jim I was doing Brussels sprouts he felt sorry for me.  And he told me that there was no way to make a Brussels sprout taste good.  The gauntlet was down.  Honeycrisp apples were on sale.  So I decided to make a warm sprout and apple slaw with lemon and walnuts.  At the store, I wanted to keep the dish vegan, so I used walnut oil, but tonight I used butter.  And guess what.  Jim ate them.  Two helpings.  So if you have a Brussels sprout hater in the family, give this recipe a try.

First, I took the zest off of one lemon, I used a Meyer lemon but any lemon will do, and squeezed the juice into the processor bowl.
putting the juice and the zest right into the processor
will keep the apple from turning brown

the apples are shredded on a medium shredding disc here,
but you can cut them into sticks by hand, as well

The brussels sprouts are then shredded on the finest slicing disc, but they are fairly easy to slice fine by hand as well.  I also cut up a shallot into thin strips, then toasted some walnuts in butter and salt, and added in the shallots.
the walnuts and shallots are cooked together in advance,
because they cook longer than the slaw

Once the walnuts are toasted and the shallots are nice and soft, remove them to a dish, melt a couple of tablespoons of butter in the pan, and add in the apples and Brussels sprouts.
the shredded sprouts and apples are sauteed just until 
slightly wilted, and beautiful bright green, about two minutes

Add in the walnuts and shallots, adjust for salt, and serve.  
a fantastic and quick way to serve Brussels sprouts,
served here with crispy chicken and spaetzle with mushrooms

Sunday, December 12, 2010

going green

I did my first full-on cooking demo at Whole Foods, and I will blog about what I cooked in a post this week, but a conversation with a customer during that demo gave me an idea for a cooking class I hope to give at the store.  The produce department is simply awash with different varities of greens, and many are unfamiliar to the average cook.  They can be a bit intimidating.

So I am going to experiment with ways to cook greens that are simple, delicious, and go beyond the Southern tradition of throwing them in a pot of water with some fat back and cooking the snot out of them.

We were having lamb tonight, so I went with a Middle Eastern take on greens, built on lacinato kale, which is a very dark green kale with pebbly-textured leaves. 
mise en place for a Middle Eastern flavored kale

The dish is simple.  Kale, with the center rib removed is torn into smaller pieces, and sauteed with grated ginger, minced serrano peppers, garlic, sweet red pepper, shallots, and a little salt.  The shallots and red peppers are sliced, the garlic and chile minced, and the ginger grated.  Ginger and lemon grass both freeze very well, and can easily be run over a microplane grater, fully frozen, to create a sort of fine snow.   

I started by sauteeing the sliced shallots and red pepper in a little neutral oil.  Once the vegetables had started to caramelize, I added in the garlic, hot peppers, and ginger.
the mixture is wonderfully fragrant

the kale goes in the pot, along with any water
clinging to the leaves

Once the kale was fully wilted, but still a nice deep green, I tasted, and added a bit of kosher salt to bring out all of the intense flavors.
a flavorful, healthy, and pretty side dish 

Served with lamb chops coated in a bit of curry powder, and some steamed rice, these greens are a delicious centerpiece of vegetables loaded with nutrients and antioxidants.

Monday, December 6, 2010

keeping with the holiday theme

One welcome addition at any holiday cocktail party is a bowl of delicious nuts.  Spicing pecans is a great way to add depth of flavor and interest to simple, tasty pecans.  I usually make a 2 pound bag of these nuts.  They make a great little party favor, wrapped in a cellophane bag and tied with a pretty ribbon.

If you have a little mini chopper or food processor, it is quick work to make the spice mixture.  If you don't, no worries, the only thing that must be minced up is some fresh rosemary.  The spice mixture is listed below.  Note that the paprika is smoked.  It used to be difficult to find smoked paprika, but it is becoming much more common.  One easy place to order it is Penzey's.  It lends a unique smoky flavor to these nuts, and well as to the brisket I blogged about earlier.  If you have it, you'll find uses for it.

Spice mixture:
2 TBS brown sugar
2 TBS minced rosemary (don't use dried -- it will burn)
2 tsp smoked paprika
1 tsp chili powder
1/2 tsp ground black pepper
1 tsp salt
1/4 tsp cinnamon
1/2 tsp tabasco
2 tsp Worcestershire sauce

I like my pecans nice and spicy, so I tend to be generous with the measurements.  You'll also need 1 1/2 pounds to 2 pounds of pecan halves and 4 tablespoons of butter.

Heat your oven to 325.  Heat the butter in a pan over medium high heat.  As soon as it begins to foam, dump in the pecans.
toasting the pecans in the butter for five minutes
brings out the aroma and crisp texture of the nuts

The spice mixture is then added to the pan, and tossed with the pecans to coat.
If you are having trouble getting the spice mixture to distribute evenly, just add in a quarter cup of water and stir until the nuts are evenly coated.  Spread the coated nuts on a cookie sheet, and bake in the oven for 15 minutes if you did not add the water.  
 a quick spin in the oven insures golden, crunchy nuts

If you did add the water, bake the nuts for about 35 minutes.   Take the pan out of the oven and allow the nuts to cool completely.  Store them in plastic containers or plastic bags.  If they are not crispy enough, give them another 15 minutes in the oven, but be patient.  Let them cool first.  They crisp up as they cool.
a bowl of spicy nuts is a nice addition
on any appetizer table

Sunday, December 5, 2010

make ahead party favorite

This is the time of year for it.  Holiday parties, football parties, office parties....

And you want food that is easy to prepare, minimal to clean-up, and well....a big fat hit.  What could be better than a spread of finger foods and salads with sliders as the centerpiece?  Sliders are great on several levels.  They are a one-handed sandwich, they are cute, easy to dress with a variety of toppings, and they are trendy.

But who on earth wants to be married to the grill in December, or hunched over a greasy frying pan in the kitchen, while everyone else is in the den, high-fiving touchdowns?

Enter: the mighty brisket.  It is a tough, relatively inexpensive cut of beef that benefits from hours of neglect in the oven, tastes better when it sits, cooked, in the fridge for a day or two, and tastes sublimely of good beefy flavor.

Oh, and it takes well to a few hours marinade in a dry rub.  Buy a commercial rub if you are short on time, but consider adding a tablespoon or two of brown sugar, which will help brown things up a bit.  Here is a simple rub for a 3 pound brisket, which will make 18--22 sliders.

2 TBS chili powder
1 1/2 TBS salt (go kosher)
1 TBS garlic powder
1 TBS onion powder
1 TBS ground black pepper
1 TBS brown sugar
2 tsp dry mustard
1 bay leaf, crumbled
2 tsp smoked paprika (optional)
1 tsp ground chipotle pepper (optional)
the last two ingredients will add smokiness to the rub, but the rub is great without them.
just mix all of the ingredients together in a bowl

Massage the rub into the brisket, wrap it in a plastic bag, and set it in a bowl in the fridge.  Now forget about it for a few hours, or a day.  When you are ready to cook it, heat the oven to 350.  Drop it into a roasting pan or a dutch oven, and roast it, uncovered, for 1 hour.  Take it out of the oven and reduce the oven heat to 300.
I had frozen beef stock in the freezer,
which I just chucked in the pan still frozen


If you want, add a coursely chopped onion and a couple of smashed garlic cloves to the pan, for a little additional flavor.  Don't even worry about removing the skins -- they will be strained out of the broth.  Add a cup of beef broth and a cup of water, cover the pot with a lid or a sheet of foil, and slide it back in the oven.  Go about your business for 3 hours.

Good for you if you cooked this a day or two ahead of the party.  It will be even better.  Just cool it in its broth, and stash it, covered, in the fridge.  On the day of the party, remove the meat to a cutting board, and strain the broth into a sauce pan, reducing it by half at a boil, which will take about 15-20 minutes.

In the mean time, slice the brisket into thin strips, against the grain (you can see the long fibers on the meat -- slice perpendicular to those.  It is important to having tender meat.)  Wrap it in foil, and heat it in a 325 degree oven.
 these tender, beefy morsels make awesome sliders

Those little potato rolls hanging out in nearly every grocery store bakery make awesome slider rolls, and add a slight counterpoint of sweetness to the spicy beef.  Just wrap them up in foil and heat them right along with the beef.  Served with a side of your favorite cole slaw (just fine if it is from the deli section), the reduced sauce for moistening the meat, and your other favorite party snacks, these little beauties will be the hit of the party.  And you'll be out of the kitchen, watching the game.
sliders are made for parties-- everyone can have as much 
or as little to eat as their hearts desire


Friday, December 3, 2010

great, fast sides for a Friday night steak

A nice grilled steak can be a great treat, and a nice way to kick off the weekend.  I prepare our steaks quite simply, with just a dusting of salt and fresh black pepper.  So I really want to have some tasty sides to go along for the party.  And if it's a Friday night, they need to be quick and simple to prepare.

Two great ones combine the flavors of traditional steak house sides, but with a lighter, and more modern twist.  The first, which are cheesy potatoes, assemble in about 10 minutes, and can bake while the rest of the meal comes together.  They start with a simple white sauce, ready in just a couple of minutes.  A tablespoon and a half of butter is melted on the stove, then an equal amount of flour goes in, and the whole gets cooked for just a minute or two, to get rid of the raw flour taste.  Off the heat, stir in about about a cup of milk -- whole or even 2% will work, but I don't recommend skim milk.  It is easier to combine with the roux if you nuke it for a minute or so in the microwave.  Warming it up makes it easier to avoid lumps.  Boil the mixture until it just thickens.  You want a fairly light white sauce, because the cheese will thicken it, as will the starch from the potatoes.  Add in just a half a cup of cheese, or about 4 ounces by weight.  The trick is to use a very sharp cheddar, which will bring more flavor to the sauce, without requiring a lot of cheese.  No need to grate it.  Just chunk it up, and stir it into the sauce over medium low heat.  Add salt and pepper to taste -- remember there are going to be potatoes as well, so don't be too shy.  A nice, but not necessary addition is a bit of freshly grated nutmeg.  It offers an earthy counterpoint to the sharp flavor of the cheese.
white sauce is one of the simplest and fastest
of the mother sauces

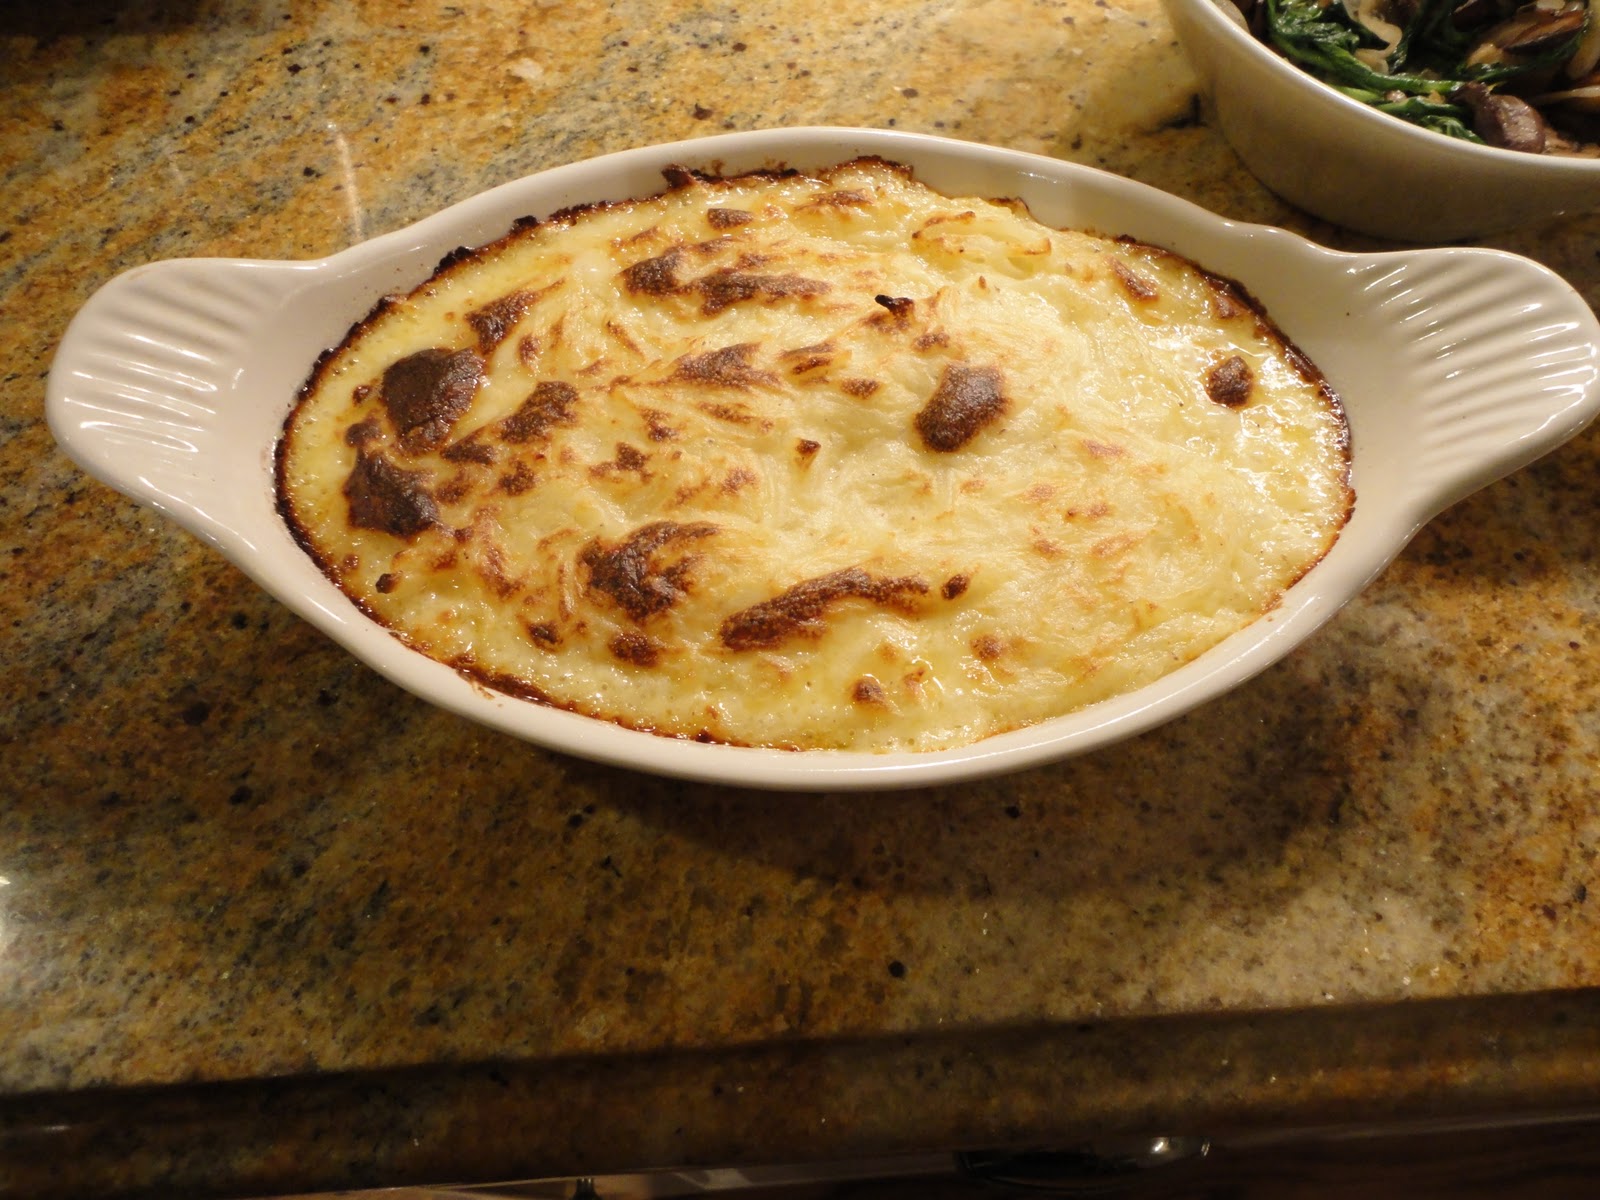
Next come the potatoes.  One of my favorite time savers is the pre-shredded potatoes available in the refrigerated section of most grocery stores.  They are not frozen, and usually hang out somewhere near the eggs.  About a half a bag will make enough for two to four people.  Just stir them into the sauce, and pour the whole into a small baking dish.  They will be cooked, brown and bubbly in about 20 -- 25 minutes in a 400 degree oven.
A creamy, delicious side within a half an hour

The second side is an updated version of the creamed spinach side and mushroom side so common to an old school steak house.  This dish combines the two, and lightens the whole by omitting the cream.  It takes longer to chop than it does to cook.  The combination of greens, mushrooms, shallots or onions, and garlic is a nutritional powerhouse packed with flavor.  It starts with a big pile of greens.  Spinach will work.  Tonight I used arugula.  Kale works, as does chicory or mustard greens.  Collards will work, but I think they are a bit to tough and bitter, and really benefit from a bit of a braise in some chicken or vegetable stock.  The one thing that really doesn't work is "baby" anything.  No baby spinach or arugula, which simply turn to slimy mush.   Buy the substantial bundles of mature greens, and wash them well.  I love this little salad spinner.  I had to wash the arugula in a couple of batches, but this little baby is effective, easy to store, and works quite well when you are cooking for one or two.
mature greens can be quite gritty, so give them 
a good soak and a spin
 This big pile of greens was enough for just two or three servings.  
It is astounding how much greens wilt down, so be prepared.

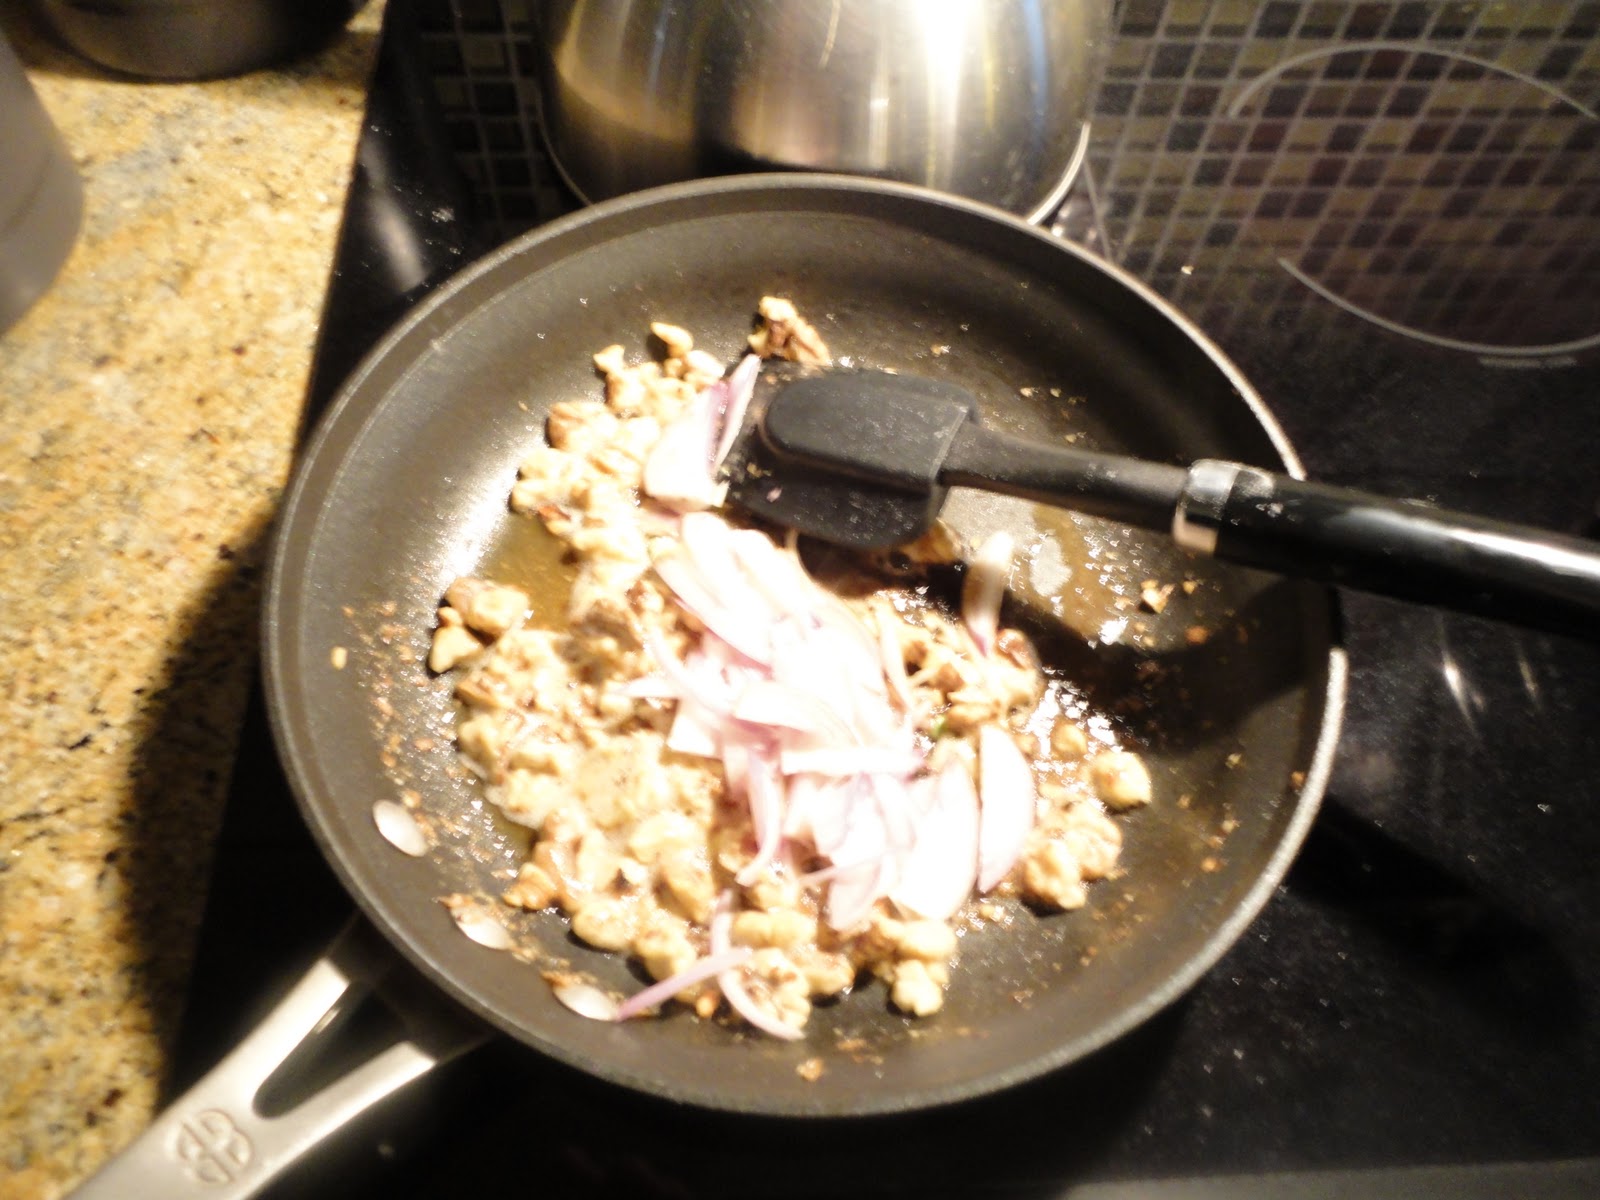
The basic ingredients for wilted greens and mushrooms are sliced mushrooms, sliced shallot or onion, one or two cloves of garlic (optional, but I love the taste of it with steak), and lemon zest and juice.  Salt and pepper, of course, and an optional little grate of nutmeg.  Nutmeg is a natural partner for both greens and mushrooms, as well as cheese.  I am a big fan, but add it or leave it out as you please.

I slice my own mushrooms and onions, but if you really want to make quick work of this, buy pre-sliced mushrooms and sliced or chopped onions.  Nearly every decent-sized grocery carries them both, as well as jarred chopped garlic.  Start with a tablespoon or so of olive oil over medium high heat.  When it is hot, add the onions and sweat them until they are beginning to turn translucent and soft.
the basics, assembled in just a few minutes

Add in the mushrooms, a bit of salt and pepper, and cook for two minutes, then add in the garlic.  As soon as the garlic becomes fragrant, add in the washed greens, and begin to toss with a pair of tongs or two wooden spoons.  They will wilt in under a minute.
use a pan large enough to accommodate the
veggies and the fresh greens


As the greens wilt, grate on a bit of the lemon zest.  Take the wilted greens off the heat, and squeeze on the juice of half a lemon.  Taste for seasoning, and if they need it, add a bit more salt and pepper, and a little more lemon juice.  Quick, healthy, and full of interesting flavors and textures.

a quick, beautiful, and modern riff on the old
classics -- creamed spinach and sauteed mushrooms

In the interest of full disclosure, I want to let you know that I started a part time job this week at Whole Foods, doing product demos -- some cooking, and some not.  It's a store I shop at often, and I sometimes mention products I get there, which I will continue to do.  I am not shilling for Whole Foods, and the only people there even aware of my blog are the two women who interviewed me.  I doubt they continue to visit.  So, if I mention something specific I like from Whole Foods, it will be because it is something I really like, that I haven't come across elsewhere.  Wish me luck -- I am going to try to get them to let me do cooking classes there, and they have already expressed some interest in seeing a proposal.