Tuesday, March 30, 2010
oy vey
I may be missing for a few days. My mom took a tumble and broke her hip yesterday. The whirl wind that followed resulted in successful hip replacement surgery today, a vigil at the hospital that could continue for several days, and angst over how to deal with her sweet cat, since she will likely be in rehab for a couple of months, and MY cat is about as welcoming to family newcomers as Sybil (Char will will know what I mean.) As a result, my last two meals have come from Wendy's and Chik-fil-a. Yuck. I feel poisoned. So I am drinking a glass of red wine to kill the cooties.
Saturday, March 27, 2010
a meal for a warm spring friday night
South Carolina breeds balmy spring nights great for grilling. The main course is often simple around my house -- a good cut of meat, seasoned simply, with kosher salt and pepper, cooked on the grill. So the sides become important. Last night, that meant some of the first asparagus of the season, and a spaetzle dish we love with red meat. I am a sucker for asparagus with hollandaise, but that can be a little caloric, so here is a preparation that is both simple and delicious. I like to peel the stems of the asparagus. It takes just a couple of minutes with a vegetable peeler, and I think it yields a more tender and less "grassy" tasting vegetable.


laying the spear flat on the cutting board makes
it easy to take off the sometimes tough outer skin.
I have sliced shallots into fairly thick rings for "frizzling"
Toss the asparagus with a teaspoon of olive oil in a baking dish, in preparation for roasting. Heat the oven to 450. They will roast in the time it takes to cook a steak. For garnish on the asparagus, I use grated lemon rind, lemon juice, salt, pepper, and "frizzled" shallots, which are basically little onion rings with no batter. They couldn't be easier. Slice the shallots into rings about a quarter inch thick. Toss them about with your fingers to separate the individual rings. In a small sauce pan, heat about 3/4 of an inch of neutral oil, like peanut oil, to shimmering. Once a single rings will sizzle in the oil, you can toss in the lot of them. Watch them closely -- they will go from brown to burnt in seconds. They really only take a minute to crisp, so it's not like you will spend ages hovering over them.

once the shallots are crisp, just drain them and let them sit
these can be done way ahead -- they are yummy on a steak as well
Now, for another great side dish for grilled meats -- spaetzle. Home made spaetzle is easy to do, but in this particular dish, the dried ones from the grocery are actually better -- the same way that dried pasta can be superior to fresh in some preparations. They are cooked right in their sauce, and soak up loads of flavor. I saute coarsely chopped mushrooms until they have exuded all of their moisture, and have begun to brown. I reserve them in a bowl, and using the same pan, I add beef broth, maybe a little white wine (red makes the spaetzle a weird color) some thyme, maybe some dehydrated onion flakes, and the spaetzle. As the spaetzle absorb the moisture, just keep adding a bit more water or broth, until they are al dente. Then add back the mushrooms, season to your taste, and serve. It is a creamy, rich tasting side dish that goes great with grilled meats.

typical store-bought spaetzle

an earthy, satisfying side dish

a tasty meal, american bistro style
I am glad to say, we aren't gluttons --
Jim and I split that steak
Friday, March 26, 2010
another "door knock dinner"
Things have been hectic lately, and I find myself scrambling for dinner on many evenings. So the other night, I pulled together another "door knock dinner" where everything had to come from ingredients available on hand. This time things came together with an Indian theme. I love basmati rice, but its tendency toward stickiness is a pain, and to cook it traditionally usually requires prolonged soaking and rinsing.
Not so, if you use the pasta method. In other words, rice in a nice big pot of boiling water. It is a foolproof method for cooking tender rice with separate grains.


I had mushrooms, onion, garlic, red bell peppers, frozen shrimp, and half a can of coconut milk on hand for the main dish. I also had some cilantro for seasoning and green, and some red curry paste. I sauteed the chopped onion, some garlic, mushrooms, the peppers, and the curry paste in a bit of peanut oil. Then I added the coconut milk, and simmered it all to crisp/tender. Tossed in the shrimp, and cooked for about 5 minutes, until they were just barely cooked through.


Not so, if you use the pasta method. In other words, rice in a nice big pot of boiling water. It is a foolproof method for cooking tender rice with separate grains.

As you can see, the excess starch rises to the surface,
out of harm's way. Simply lift a few grains
on a fork , to taste for doneness.

perfectly cooked rice in about 15 minutes
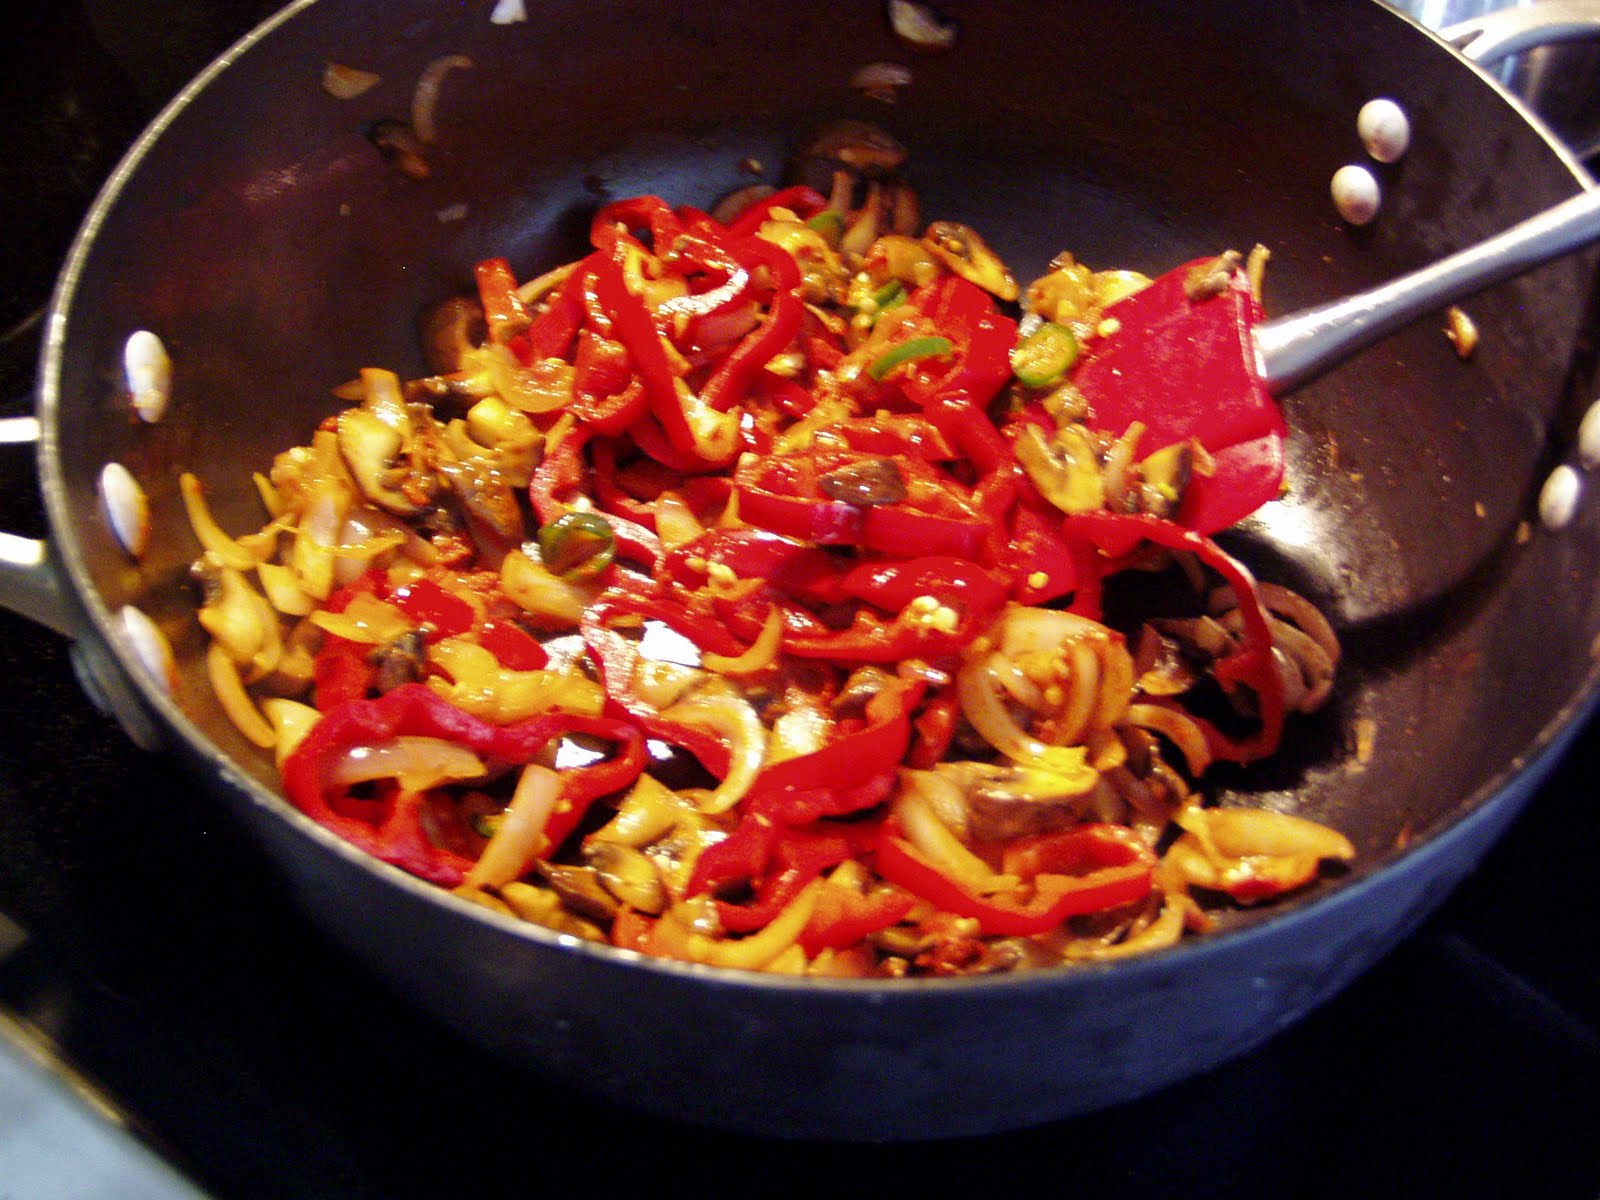
A quick saute

shrimp curry, served over rice,
and garnished with fresh cilantro
It was a healthy, tasty meal in under 30 minutes. A weeknight triumph. (Coconut milk hint: if you use less than a full can, as I do, with just two to feed, the other half will freeze perfectly in a freezer bag.)
Monday, March 22, 2010
working the eggplantation
Our fit of (mostly) premature gardening on Sunday got both of us jonesing for the very veggies we were anticipating in the garden. Namely, tomatoes, eggplant, basil, garlic, onion...
So, a nice Italian eggplant from Whole Foods, and we were in business. I started with a simple sauce -- minced onion and garlic, sweated to translucency, a few sprigs of thyme tossed in (still growing in the garden from last year) along with some kosher salt and red pepper flakes. Then a half cup of white wine, and a can of Muir Glen fire roasted, diced tomatoes. All simmered together gently on the stove. I like to bust up the sauce just a bit with an immersion blender, just to reduce the size of some of the tomato chunks. Not too much.
While that simmered, I coated the sliced eggplant (sliced on the bias to increase the surface area) in flour, then egg, then panko breadcrumbs seasoned with a bit of salt and dried oregano, and set them on a rack to set up a bit.

letting the coated slices rest a bit helps the crust to adhere
next step -- frying the slices in about a half inch of shimmering-hot peanut oil. You can use other oils, but I like peanut oil's high smoke-point and its nuetral flavor.

If your oil is nice and hot, your eggplant will soak up very little oil
After that, it's just a matter of assembling. I turned off the heat on the sauce, then stirred in a big handful of basil. Then I ladled a nice spoonful of that into a small casserole dish, layered on eggplant, a little more sauce, fresh mozzerella, a bit more sauce, and more basil and a sprinkling of parmesan. Takes longer to type it than to do it.

ready for the oven
It occurs to me that this pic looks an awful lot like my enchilada picture from a past post. Trust me, they taste very different. I am a big fan of the flavors of tomatoes and fresh herbs, and I have a weakness for cheese, so they tend to show up in my food quite often. The eggplant parm bakes in the oven just until the cheese is bubbly and brown -- just a few minutes, since all of the elements are still warm. It's a yummy vegetarian treat.

the finished dish, sprinkled with a bit of parsley from the garden
Sunday, March 21, 2010
Classic Pesto
One can make "pesto" out of about anything these days. After all, it really just means "paste." But I must admit, my favorite "paste" out there is still made of basil, pine nuts, garlic, Parmesan, and olive oil. Yesterday, I planted my first basil plants of the year in the garden, which made me crave pesto, and soooo.... I promptly went out and bought a big pile of basil at Whole Foods.
Jim (sig gets a name) talks about what he calls his "top twenty" -- his favorite meals I've cooked -- and pretty high up the list is grilled lamb chops with pasta and pesto. It is a "neo" classic pairing, given basil's close relation to mint, which is the classic herb pairing for lamb. Give it a try. You will be astonished at how well they go together. So, without further ado....


Jim (sig gets a name) talks about what he calls his "top twenty" -- his favorite meals I've cooked -- and pretty high up the list is grilled lamb chops with pasta and pesto. It is a "neo" classic pairing, given basil's close relation to mint, which is the classic herb pairing for lamb. Give it a try. You will be astonished at how well they go together. So, without further ado....

Mise en place (things in place, literally) for pesto.
We have basil, garlic, toasted pine nuts, parm, and olive oil.
It's that simple.
It's a little extra step, but toasting the pine nuts is worth the effort. They take on a crispier texture, and a richer fragrance. The great thing is, you can toast a bunch at once, and freeze what you don't need. Then the next time, they go straight into whatever recipe you are using them for.

take them off the heat as soon as they begin to brown
they go from brown to burnt in seconds
As soon as the nuts cool, you are in business. And that business is best done in a food processor. Well, some purists would say it's best done in a mortar and pestle, but in my house that would mean it would rarely get done. I like to start by grinding the garlic and nuts, and then adding the basil, then the already shredded or ground cheese. Turn on the machine, and drizzle in the olive oil, until you have a nice, thick paste. Make a lot. It freezes extremely well.

hmmmm....pesto.....
To freeze it, portion it out in zipper freezer bags, press out all the air, and freeze it flat. It remains pliable enough that if you need just a small amount, you can break off a little chunk of the frozen stuff, and pop the rest right back in the freezer.
I'm not going to say much about the lamb chops, except that all I season them with is salt and pepper. They go on the grill for about 4 minutes a side for medium rare, rest for a few minutes, and this is what dinner looks like.

I think this looks pretty yummy,
but I think I need to get a white plate for the photo shoots.
Chicago style deep dish pizza
I am a fan of thin, crackly crusted pizza, and make them often, but every once and a while I like a deep dish pizza, done the Chicago way, which is more like a lasagna, with a crust instead of noodles. It made a satisfying dinner last night after a day spent in the garden.
I like the Cook's Illustrated recipe for duplicating the chi town crust, but any pizza dough you like will do, including dough from the grocery store. http://www.cooksillustrated.com/recipes/detail.asp?docid=21349 will take you to the CI dough recipe, but I most definitely part company with them on the sauce, which they make with crushed tomatoes. The best chi pies I have had always had nice chunks of tomato in the sauce.


Liberally oil the pan with a tablespoon of olive oil, and line it with the crust, being sure the crust goes an inch up the side of the pan. If you have too much crust in some spots, and not enough in others, don't be afraid to tear and patch. This is a forgiving crust.


New Yorker's would be horrified that this is called "pizza", but whatever you call it, it is delicious!
I like the Cook's Illustrated recipe for duplicating the chi town crust, but any pizza dough you like will do, including dough from the grocery store. http://www.cooksillustrated.com/recipes/detail.asp?docid=21349 will take you to the CI dough recipe, but I most definitely part company with them on the sauce, which they make with crushed tomatoes. The best chi pies I have had always had nice chunks of tomato in the sauce.

the ingredients for a simple sauce that lets the tomato shine
I am going to shamelessly plug an ingredient here, but believe me, I have no motive other than my personal satisfaction at sharing a great ingredient with you. Muir Glen makes an organic, fire roasted diced tomato, with no added salt. I am lucky that my local grocery carries them in their "health food" section. The tomatoes are very flavorful, and in a tomato broth that is not too thick and not too watery. And the "no salt" version allows you to control the salt in your dish. If you can find them, buy them. If you cannot find the "no salt" version, buy the one with salt. Amazon has them. http://www.amazon.com/Muir-Glen-Organic-Tomatoes-14-5-Ounce/dp/B000LKZ9IC/ref=sr_1_1?ie=UTF8&s=grocery&qid=1269169527&sr=8-1
I open the can, and mix my sauce right in the can. I add a couple of minced cloves of garlic, some fresh or dried oregano, depending on what I have, kosher salt, and pepper. I sometimes add some crushed red pepper, if I want a little kick. I want the tomato taste to take center stage.
The pizza is made in a 9 inch heavy pie plate, or a cast iron skillet. This is not a terribly dough-heavy dish. The dough should be rolled out into a quarter inch thick disk.

The dough is rolled to a 1/4 inch thick disk
Liberally oil the pan with a tablespoon of olive oil, and line it with the crust, being sure the crust goes an inch up the side of the pan. If you have too much crust in some spots, and not enough in others, don't be afraid to tear and patch. This is a forgiving crust.
Here's where the pizza parts company with most pizzas: your mozzarella cheese goes in first, directly on the crust. Use about a pound, either shredded or sliced. Then your toppings. Last night I used sausage, shallots, and mushrooms. Cook the sausage through. If you are using veggies that have a lot of moisture, like mushrooms and onions or shallots, you may want to saute them for a few minutes as well, to remove some of the excess moisture. (Pepperoni hint: if you sweat the slices over low heat for a few minutes, then drain them on paper towels, you will have all the pepperoni flavor, with much less of the fat.)
On top of the fillings, add the tomatoes. I use the entire 14.5 ounce can. It is now ready for the oven. I do like a little brown cheese on top, so I add a bit of grated parm, or as was the case last night, gruyere. I preheat a pizza stone in a 400 degree oven, just to crisp the bottom crust a bit more, but that is optional. You can just slide your pie into a 400 degree oven.

the pie, ready for the oven
It takes about an hour to bake, so be patient. Once it is nice and brown and bubbly, remove it from the oven, and let it rest for 5 minutes. It is easier to cut it on a pizza paddle or a cutting board, so using a thin spatula, loosen the crust around the edges of the pie pan, and gently slide it out onto a board. A slice with a nice green salad makes a hearty and delicious meal.

last night's pie, ready to slice
New Yorker's would be horrified that this is called "pizza", but whatever you call it, it is delicious!
Thursday, March 18, 2010
just a "heads up"
I have added a new element to the blog called "equipment to drool over," under the "drinks on the side" column, over on the right hand side. It is an experiment in listing links to equipment that isn't basic -- it's the stuff I either covet, or that I might have, that I consider a bit of an indulgence. The first three listings include


the newest Cuisinart food processor. I covet, but my
old one is just fine, so I will continue to covet from afar...
The Bamix. I hear this is a great stick blender, but alas....
again, my stick blender does a great job, so....
and...
This one of the pans from the Master's Collection of pans from the CIA. I am intrigued,
because it is less expensive than All Clad, and I like what I read about it.
At any rate, the new sidebar element offers links to products I think would be fun to have, or that I already know are fun to have.
Please check out the links, and let me know here if you think you would enjoy seeing more of them in the sidebar. Thanks!
Wednesday, March 17, 2010
Tortilla soup
A great way to use some of those leftover corn tortillas is in a tortilla soup -- a light, spicy broth of vegetables, corn, and chicken, garnished with crispy tortillas. Served with a refreshing side of jicama slaw, and corn muffins, it's a good meal.
Before I get to the soup, I just want to make a quick trip back to the jicama slaw. I know I blogged about this recipe before, so I won't go into to much detail, but I wasn't taking pictures before, and I thought you might want to see a bit of the slaw action, and the finished product:


Before I get to the soup, I just want to make a quick trip back to the jicama slaw. I know I blogged about this recipe before, so I won't go into to much detail, but I wasn't taking pictures before, and I thought you might want to see a bit of the slaw action, and the finished product:

Ingredients for the slaw. The recipe is in an earlier blog.
The white and light green parts of the green onion, the orange and lime zest, a tsp of salt, the lime and orange juice, one or two hot peppers, and a half cup of oil go into a blender, and are blended until you have a creamy, pale green dressing. Simple as that.

A very easy dressing getting ready for the blend.
The julienne jicama, the thinly sliced sweet red pepper, and chopped cilantro get tossed in a bowl, and dressed. The result: a pretty, crisp, citrusy slaw that compliments many spicy foods. Or even a burger, for that matter. Can't find jicama? No worries. I've done this exact recipe substituting Granny Smith apples for the jicama, and it makes a wonderful and unusual apple salad.

A real plate and palate brightener.
The tortilla soup. It's a very easy, almost chili-like soup loaded with healthy, delicious ingredients. I start by poaching half of a chicken breast, very low and slow (bone in, no skin) in half a diced white onion and four cloves of garlic sweated until soft but not brown, chicken broth, one or two chipotle peppers, a little salt, ground cumin and coriander, and some diced fresh tomato, until JUST cooked through, about 25 minutes at a very low simmer.

Chicken breast poaching in broth and veggies, just after the addition of spices.
I allow that to cool, remove the breast from the broth, shred the meat, then blend the cooked broth until smooth. Add that back to the pan, then add fresh or frozen corn, small diced onion, and more fresh diced tomatoes, some diced sweet pepper if you like, and any other veggies that float your boat. The idea is to have the rich flavor of the long cooked veggies, topped with the bright note of just tender fresh vegetables.
While the fresh veggies simmer for 15 minutes or so, cut a few corn tortillas in thin strips, toss with a little oil, just enough to lightly coat them, and crisp them under a low broiler or in a 425 oven, stirring every few minutes.
Shred the chicken, and add it to the soup. Warm it for a minute or so, then ladle into bowls, garnish with a dollop of guacamole, or a couple slices of avacado, a little nest of crisp tortilla strips, maybe a little grated cheese and chopped cilantro, and a drizzle of crema. And how could I forget. A nice squeeze of lime over the top...
(A little cheese tip: buy the very best cheese you can afford, and you'll use less and get more flavor. Tonight I used a very sharp English cheddar, and just a couple of tablespoons of grated cheese added a ton of flavor.)
(A little cheese tip: buy the very best cheese you can afford, and you'll use less and get more flavor. Tonight I used a very sharp English cheddar, and just a couple of tablespoons of grated cheese added a ton of flavor.)

Loaded with flavor and texture
Friday, March 12, 2010
home made stock
Home made stocks do not have to be an all day affair, thanks to the wonders of the pressure cooker. They freeze beautifully, they add wonderful flavors to soups and sauces, and they allow you to control the salt content in your food. With a pressure cooker, you can make a pot of beef stock in under 2 hours.


my pressure cooker is an electric model,
but stove top models work just as well
Buy 4-5 pounds of oxtail, neck bones, and back bones for making 5 quarts of stock. I also throw any meat trimmings I have, including steak bones, gristle, etc. in a stock bag in the freezer. I also throw veggie trimmings in the bag -- carrot and onion trimmings, leek tops, celery trimmings, leftover herbs...
When you are ready to make a stock, roast the bones in a 425 oven for about 45 minutes. This works equally well for chicken. (I usually use chicken wings for chicken stock.) After the bones are roasted, they go into the pressure cooker, along with the vegetable trimmings, straight from the freezer, and any other herbs, spices, or veggies you want to use. I do not add salt to stock, so I can season as I use it to cook.

roasted beef bones
The pressure cooker is brought up to pressure, then the stock cooks for one hour. 45 minutes for chicken stock. Strain the stock, and you are done.

an excellent strainer for stock is a chinoise,
which has a very fine mesh. These can be $100 or more.
I found mine at a restaurant supply store for $25
The pressure cooker does an excellent job of extracting gelatin from the meat bones, so once the stock has cooled in the fridge, you will have a gelatinous stock from which you can easily remove the fat, portion it out, and freeze. It will keep for months in the freezer.

the fat skims away very easily

chilled stock rich with gelatin
Add your home made stock to soups, stews, gravies, and sauces. Delicious!
Wednesday, March 10, 2010
The right tools for the job
Trying to get a job done in the kitchen with the wrong tool is about as dumb as trying to use your shoe to drive nails. Or using a weed whacker to mow the lawn. But I see people struggle in the kitchen, trying to make due with some of the worst equipment, or simply the wrong equipment, all of the time. And I'm not talking fancy stuff, either. I'm talking some of the simplest, cheapest tools out there. Here's a few of the items that I don't think any kitchen should be without.
Tongs..... I have four pairs. Two of different lengths with nylon heads that won't scratch non stick pans, and two with metal heads. The longest pair can reach far back into the oven, do duty at the grill, and assist at lifting a turkey out of a roasting pan. All of them are extremly useful for turning foods, lifting things out of pans, and arranging hot foods on plates. If I could have only one pair, I would go for the medium length pair with the nylon heads. It can do just about anything you need to do with lifting and turning.


Hasta la Vista, babies. See you soon!
Tongs..... I have four pairs. Two of different lengths with nylon heads that won't scratch non stick pans, and two with metal heads. The longest pair can reach far back into the oven, do duty at the grill, and assist at lifting a turkey out of a roasting pan. All of them are extremly useful for turning foods, lifting things out of pans, and arranging hot foods on plates. If I could have only one pair, I would go for the medium length pair with the nylon heads. It can do just about anything you need to do with lifting and turning.

Tongs -- a real kitchen work horse. Look for them in places like TJ Maxx or Ross, and you'll snag them for a song.
A good chef's knife AND a bench scraper. Buy the best knife you can afford, keep it sharp, and only use it to cut, then use the bench scraper to scoop up items from the cutting board. Using the blade of your knife to transfer food from the cutting board is hard on the blade, and also a good way to cut yourself. My bench scraper is so old, it has "Graham Kerr" stamped on the blade.

The reason that knife blade looks so good is that old bench scraper.
I would never use my knife blade to pick up items on a cutting board.
A good, good-sized wood cutting board. I like these bamboo numbers. I like having one with a channel for carving roasts. You want some size, so if you have multiple items to chop, you can just push one to the side and chop the next. They take a few seconds to wash with warm soapy water, they are stable to cut on, and they are beautiful to look at. I found both of these boards at Ross for under $12 each. If you oil them once and a while, and don't leave them soaking in water, they will last for years. Forget those lame plastic sheets. They don't provide a stable surface, they slip, and they warp in the dishwasher.

oil wood cutting boards with a few swipes of mineral oil, which you can find
in the drugstore. It will keep them from drying out.
Staying on the knife theme... A good place to store your knives! Do not, DO NOT toss your sharp knives loose into a drawer. It is terrible for the blades, an open invitation for severing the fingers of the innocent, and, did I mention? An exceedingly bone-headed thing to do. I use a knife block. Alternatives are: a wall mounted magnetic strip, a drawer fitted with slots for storing knives, blade protectors that can go on to the blade before it goes in the drawer. Heck, you can even make your own blade protectors with corrugated cardboard and some duct tape. No Excuses.

I find a block convenient. And for cripes sake, take a few seconds to hand wash your knives.
No tossing them in the dishwasher.
A good wire whisk. By "good" I mean "the more wires the better." The idea of whisking is agitating food in order to incorporate air, create a homogeneous sauce , or combine wet and dry ingredients. The more wires, the faster that happens. A good whisk can do almost anything a hand mixer can do. And they are cheap.

beat eggs, whip cream, whip eggs whites, make sauces, blend gravies....
A silicone spatula. These have virtually replaced wooden spoons in my kitchen. They are heat proof, flexible enough to get into corners and efficiently clean out a bowl, and stiff enough to mix cookie doughs, dressings and batters. They are dishwasher safe, cheap as dirt, and real multitaskers.

3 handy spatulas: one large and stiff for big jobs, one more flexible,
and one with a slight "scoop" shape
A "safety" can opener. That's the kind that removes the lid from the sides, rather than cutting down into the metal. A blade-type can opener can get food on the blade and into the mechanism, and is a prime breeding ground for all kinds of nastiness. One of these never touches the food, eliminating the problem. Throw away your blade style models (including that fancy electric one) and pick up one of these for a few bucks.

A great investment of a few bucks. No more "can opener botulism special"
on the menu.
on the menu.
I have a few more, but that's probably enough for one post. So, I'll wrap up this list with one last item. A good pair of oven gloves. Ones that have a good grip, feel good on your hands, and KEEP OUT THE HEAT. No more trying to lift a roast out of the oven with a half damp dish towel from the counter, screaming in agony as you dash for the counter, with steam frying your hands. Please.

These are made of neoprene, grippy, flexible, dishwasher safe,
and heat resistant to 500 degrees.
Hasta la Vista, babies. See you soon!
The incredible, edible hamburger
Watching Tony Bourdain munch some very yummy looking burgers has put me in the mood for a good hamburger. And of course, since I have the meat grinding attachment for my Kitchen Aid, I decided to grind my own cow. Don't think it will be cheaper than buying hamburger, but I'm betting it will be better.
After a little internet research, I determined that sirloin, chuck and short ribs would be a good first try at good balance between beefiness, fat, and tenderness. I couldn't find boneless short ribs, so I bought bone-in ones. It really wasn't hard at all to remove the meat from the bones in short order, and toss the bones into my freezer stock trimmings bag.
Next, I cut all of the meat into 1 inch strips, and popped it on a cutting board in the freezer. Meat is much easier to grind if it is partially frozen. A couple of hours will do the trick.

It is best to grind the meat on the larger disc, then run it back through the smaller disk to be sure the meat is nice and tender, and the fat is well distributed. I seasoned the meat with salt and pepper before grinding, and even added a couple of tablespoons of cold butter as I ground, for a little extra richness in the meat. (Ever been served a steak with a little disc of compound butter melting on top? Beef and butter are natural partners.)
And of course, what is a burger without fries? The food processor makes short work of a couple of baking potatoes, and cuts the fries thin enough that it is not necessary to cook them twice to get a crispy fry with a tender center. Soaking them in the fridge for a couple of hours will help wash away some of the excess starch and increase crispiness as well.

Some caramelized onions, a few slices of comte cheese (similar to gruyere), grainy mustard/mayo spread, and lettuce and tomato perfectly complement a good medium rare burger. And let's not forget, a nicely toasted bun.

After a little internet research, I determined that sirloin, chuck and short ribs would be a good first try at good balance between beefiness, fat, and tenderness. I couldn't find boneless short ribs, so I bought bone-in ones. It really wasn't hard at all to remove the meat from the bones in short order, and toss the bones into my freezer stock trimmings bag.
 t
t
trimming the short ribs
Next, I cut all of the meat into 1 inch strips, and popped it on a cutting board in the freezer. Meat is much easier to grind if it is partially frozen. A couple of hours will do the trick.

Chuck, sirloin, and short ribs for hamburger.
It is best to grind the meat on the larger disc, then run it back through the smaller disk to be sure the meat is nice and tender, and the fat is well distributed. I seasoned the meat with salt and pepper before grinding, and even added a couple of tablespoons of cold butter as I ground, for a little extra richness in the meat. (Ever been served a steak with a little disc of compound butter melting on top? Beef and butter are natural partners.)

the second grind
And of course, what is a burger without fries? The food processor makes short work of a couple of baking potatoes, and cuts the fries thin enough that it is not necessary to cook them twice to get a crispy fry with a tender center. Soaking them in the fridge for a couple of hours will help wash away some of the excess starch and increase crispiness as well.

potatoes soaking in cold water
Some caramelized onions, a few slices of comte cheese (similar to gruyere), grainy mustard/mayo spread, and lettuce and tomato perfectly complement a good medium rare burger. And let's not forget, a nicely toasted bun.

success!
Saturday, March 6, 2010
Door-knock dinner
An old, OLD Food Network favorite of mine, "Door Knock Dinners" featured the slightly goofy and ever affable Gordon Elliot, invading strangers homes, and dragging a chef behind him. While Gordon goofed around with the family, the chef was charged with making a gourmet dinner using only what was available in the kitchen. I loved the concept, and I have challenged myself to a "door knock" dinner at least once or twice a month for many years.
Okay, I know. It's my OWN kitchen. And I shouldn't really have much trouble putting together a great dinner out of my own supplies. So here's the gig -- I can't make anything that I have made before. No recipes. And any convenience food I use has to be used in a way I don't typically use it. The rules force me to really root around in the pantry and the freezer, which means I find things I've forgotton I have. And it forces me to look at familiar ingredients in way I haven't used them before. One example, from tonight's "door knock":

Okay, I know. It's my OWN kitchen. And I shouldn't really have much trouble putting together a great dinner out of my own supplies. So here's the gig -- I can't make anything that I have made before. No recipes. And any convenience food I use has to be used in a way I don't typically use it. The rules force me to really root around in the pantry and the freezer, which means I find things I've forgotton I have. And it forces me to look at familiar ingredients in way I haven't used them before. One example, from tonight's "door knock":

Haricort Verts with Cippolini and Almonds
I found some great frozen beans that I had forgotten about in the freezer, along with some slivered almonds, and a small bag of home made parmesan bread crumbs, already toasted. (When I have a few slices of crusty bread left over, I often make them into seasoned bread crumbs and toss them in the freezer.) I had a red cippolini onion in the pantry that I bought at Whole Foods, mainly because I hadn't seen red cippolini onions before.
So I sliced up the cippolini, and sauteed it to translucency in a bit of olive oil; while I did that, I toasted the almond silvers lightly in a dry saute pan.
I added the beans to the softened onions, straight from the freezer, and continued to saute. As the beans approached tender/crisp, I drizzled on balsamic vinegar flavored with lemon that I bought on a whim at Home Goods. If I hadn't had that, I would have just used some balsamic, and maybe a bit of lemon zest from a lemon in the fridge. Once the beans were tender, but still green, I sprinkled on the almonds and bread crumbs, and served. 15 minutes from start to finish.
I used some leftover frozen hashbrowns, a bechamel, a shallot, the last few ounces of a chunk of Comte cheese, a few grates of nutmeg, salt and pepper, to make a potato gratin. Because the hash browns are shredded, a gratin will cook in about 20 minutes. Making the bechamel takes about 5-8 minutes.
I made garlic toast from good garlic baguette slices in the freezer,along with some good butter with a bit of lightly steamed garlic and salt in it. (Garlic hint: if you want to mellow raw garlic a bit, toss it in the microwave on high for about 15 seconds. It takes off that raw "edge" and makes it a snap to peel as well.)
I confess. I cheated on the meat. We had a great looking porterhouse in the freezer, and the temp hit 60 today, so we just tossed that on the grill seasoned with salt and pepper. Hey. I have a cold. So I was lazy, and cheated a bit. It was beautiful piece of meat, and it called to me while I was rooting around in the freezer.
Try your own "door knock" dinner -- It's a great way to get those odds and ends out of the pantry, fridge, and freezer in new and interesting ways.
Friday, March 5, 2010
tonight's enchiladas
As you can tell, I've been a wee bit obsessed with corn tortillas, and I finally got a memory card for my old Olympus (had to scout Ebay for an old Smartcard). So, to have occasion to post a little food porn, I made enchiladas for dinner tonight.

The tortillas are in the making below. Here is the finished product:

A fun little tip -- for great Mexican crema, just stir a quarter cup of buttermilk (make sure it has live cultures) into a cup of cream. Let it sit at room temp overnight, then refrigerate. It will continue to thicken in the fridge. I like to mix mine up in a cheap plastic squirt bottle, so I can drizzle it over foods when I garnish. These chicken enchiladas are garnished with green onion, chopped cilantro, and crema. The filling is chicken, roasted mexican chilis, a serrano chili, onion, grated cheese, and a bit of the sauce to bind. Salt and pepper, of course. Very simple stuff.

roasted veggies for enchilada sauce
The tortillas are in the making below. Here is the finished product:

A fun little tip -- for great Mexican crema, just stir a quarter cup of buttermilk (make sure it has live cultures) into a cup of cream. Let it sit at room temp overnight, then refrigerate. It will continue to thicken in the fridge. I like to mix mine up in a cheap plastic squirt bottle, so I can drizzle it over foods when I garnish. These chicken enchiladas are garnished with green onion, chopped cilantro, and crema. The filling is chicken, roasted mexican chilis, a serrano chili, onion, grated cheese, and a bit of the sauce to bind. Salt and pepper, of course. Very simple stuff.
Subscribe to:
Posts (Atom)